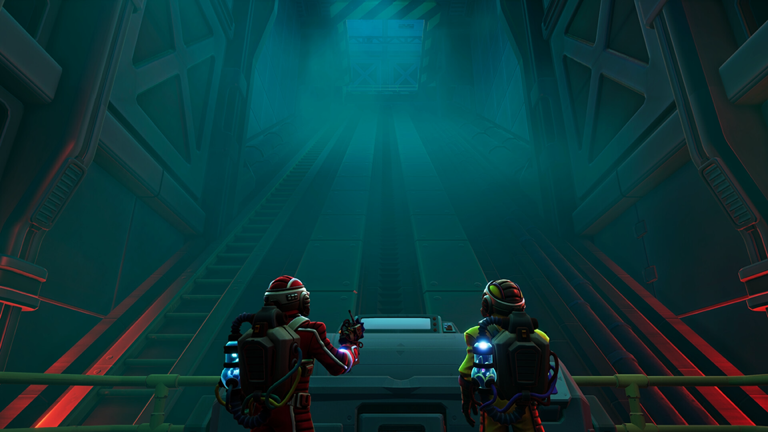
If you and a partner are looking for the ultimate cooperative test of communication and trust, following a comprehensive We Were Here Tomorrow walkthrough is your best bet for survival. Stepping into this mysterious retro-futuristic facility means you will rely entirely on your walkie-talkies, quick thinking, and asymmetrical puzzle-solving to make it out alive. Whether you are stuck on the color-coded valve basements, navigating the maze, or trying to survive the tense theater climax, this We Were Here Tomorrow walkthrough covers every single obstacle from start to finish.
Co-op puzzle adventures require absolute synchronicity between players separated in distinct locations. Total Mayhem Games has crafted another masterpiece of asymmetrical design where neither player has the full picture on their own. Let’s dive right into the complete puzzle solutions, mechanics, and strategies required to conquer the experience.
Getting Started: Communication and Setup
Before diving into the complex riddles, you and your partner need to establish ground rules for communication. While third-party apps like Discord are popular, the in-game walkie-talkies add an authentic layer of immersion and tension.
Both players must pick up their respective equipment immediately upon spawning. Failing to communicate clearly will result in quick failures, especially during timed sequences where one player faces mortal danger while the other operates controls.
| Role | Primary Responsibility | Key Tools |
|---|---|---|
| Explorer | Navigating physical rooms, pulling levers, avoiding hazards | Walkie-talkie, map, flashlight |
| Librarian | Researching texts, guiding paths, operating facility switches | Walkie-talkie, reference books, archives |
Community reports indicate that keeping a notepad handy for both players significantly speeds up puzzle resolution, particularly when sharing complex symbols, colors, and sequential steps across rooms.
Early Puzzles: Paintings and Color Valves
The opening chambers test basic descriptive skills and matching mechanics. As the explorer progresses through the facility, they will encounter painting setups that require specific symbols placed underneath based on the gallery clues provided to the librarian.
Next comes the valve room challenge, which introduces color theory mechanics into the cooperative loop.
| Step | Explorer Action | Librarian Action | Solution / Goal |
|---|---|---|---|
| 1 | Identify door sign color | Check basement valves | Match colors (e.g., Blue + Yellow = Green) |
| 2 | Call out labyrinth symbols | Provide map directions | Pull levers: Blue, Green, Blue, Red, Blue, Green |
| 3 | Turn on emergency generator | Guide chess piece movement | Prevent freezing to death by acting fast |
According to player experience shared within the community, rushing the generator sequence is the leading cause of early deaths. Always ensure the explorer is warmed up and ready before the librarian confirms the chess layout.
Navigating the Labyrinth and Book Platforms
Once past the foundational rooms, the facility opens up into more intricate spatial challenges. The labyrinth puzzle requires precise lever pulls. If you stray from the correct sequence, progress halts immediately.
Following the maze, players face the book-matching platform section. Here is a quick breakdown of how to handle the platform sequences safely:
- Book Identification: The explorer describes the cover symbols aloud.
- Archive Search: The librarian locates the corresponding text in the database.
- Safe Pathing: The librarian directs the explorer across the floating platforms.
If a mistake is made, the game mercifully prevents instant death, though the book will reset and swap for a fresh configuration, requiring re-evaluation.
The Theater Climax and Final Act
The tension peaks in the theater level, where the librarian must operate a gramophone while an aggressive marionette stalks them. The explorer must quickly bring the correct stage props to progress through the acts.
| Act Stage | Required Stage Props / Environment | Objective |
|---|---|---|
| Act 1 | Castle + People | Establish baseline performance setup |
| Act 2 | Castle + Queen + King | Introduce royalty components |
| Act 3 | Castle + Queen + King + People | Expand narrative complexity |
| Act 4 | Castle + Queen + People + Mad King | Escalate tension before lighting shift |
| Act 5 | King + Blood Light | Activate special illumination and trapdoors |
Once all acts are successfully completed, players must head through the trapdoors behind the king to reach the climax of the adventure.
Understanding the Endings and Achievements
Reaching the end of the game forces a poignant narrative choice. Ultimately, you will reunite with your partner, but only one explorer can escape the facility.
- Worst Friend Forever: Awarded to the player who chooses to leave.
- Why me?: Awarded to the player who makes the ultimate sacrifice.
For players aiming for 100% completion, community reports highlight several hidden interactions. For instance, interacting with the pink switch multiple times in the dungeon puzzle until confetti appears triggers a secret community-loved Easter egg. Additionally, players attempting the grueling “Die Hard” achievement must complete an entire playthrough without dying and without making a single mistake.
For more details on indie cooperative releases, check out the official Total Mayhem Games website.
Frequently Asked Questions
Do both players need a microphone for We Were Here Tomorrow?
Yes, active communication is mandatory. While you can use external voice apps, picking up the in-game walkie-talkies is required to trigger mechanics and progress through the adventure.
How long does a standard playthrough take?
A typical first-time playthrough takes roughly 3 to 4 hours, depending on how quickly you and your partner communicate and solve the asymmetrical puzzles. Because the game features two distinct roles, achieving 100% completion requires playing through the entire campaign twice from both perspectives.
Can I play We Were Here Tomorrow solo?
No, the game is strictly designed as a cooperative experience for two players. Each player occupies a completely separate area and holds half of the information needed to solve every puzzle.